

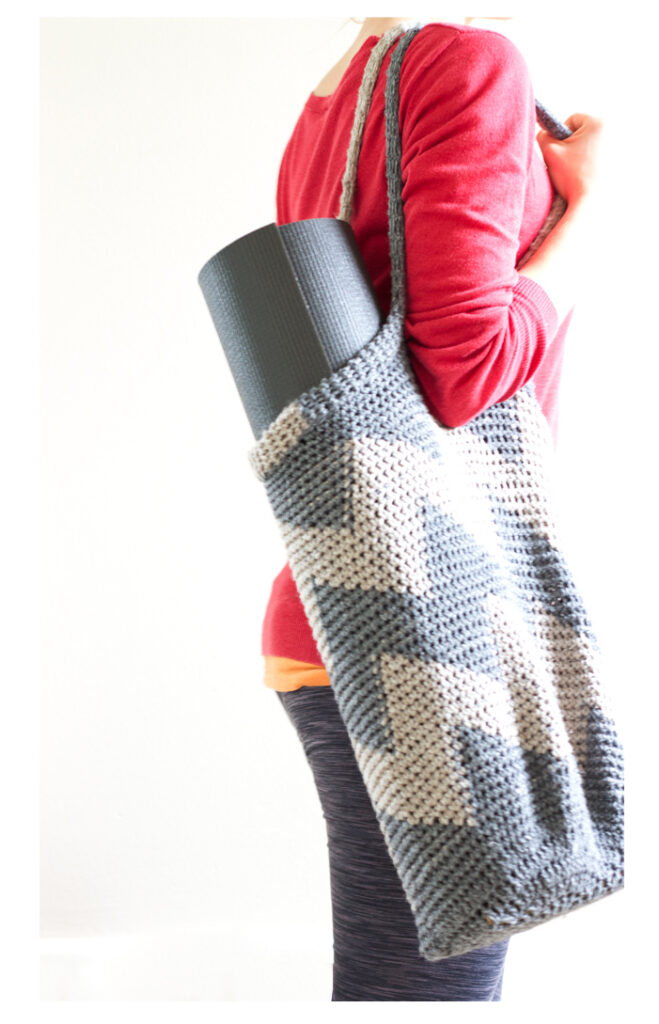
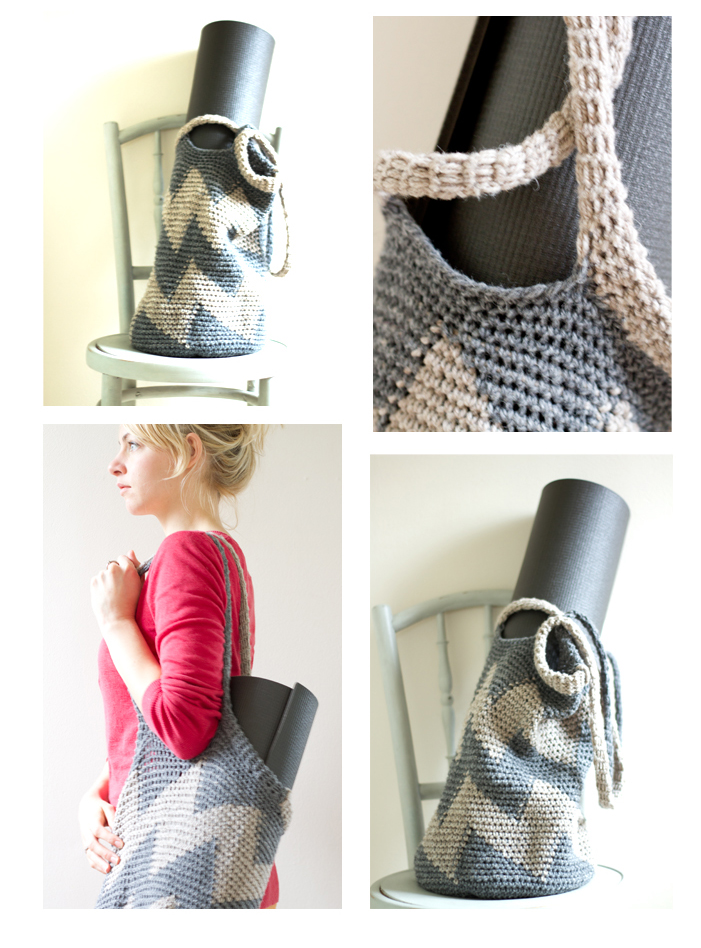
Back in 2011, before I realised designing patterns would become a big part of my future, I decided I needed a new yoga mat bag… I already had a yoga bag, but I could never use it to travel with if I went to London for yoga retreats orc lasses because it carried my mat horizontally and I was constantly bumping into people on the trains, buses and pavements. So I thought I’d make a bag that I could sling over my shoulder to carry my mat vertically. However, I also wanted it big enough to carry some spare clothes, a water bottles and a few extras.
My solution was to crochet crochet a nice chunky yoga bag. I do however have one warning when it comes to crocheting bags:
- Don’t be tempted to make the handles too long, they stretch. Quite a lot!
- Use a sturdy yarn like a cotton, linen or 100% wool without any stretch!
Yarn used for the original bag: Patons Wool Blend Aran
- 1x skein charcoal (yarn A)
- 1x skein taupe (yarn B)
- Crochet needle 5mm
PATTERN
Crocheting in the round, use a stitch maker at the end of each row.
Row 1: Ch 5 , sl st into first st to make a loop
Row 2: 8 sc into loop, sl st into first sc.
Row 3: 3 ch, 1dc into same stitch as the chain, then 2dc in each st until end, sl at into the top st of the turning chain. (16 stitches)
Row 4: Same as row 3 (32)
Row 5: 3 ch, (2dc into next dc, 1dc into next dc ie. increase every other stitch) – repeat until end sl st into chain. (46 stitches)
Row 6: 3 ch (dc into next two st, 2dc in next st ie. increase on every 3rd stitch) – repeat until end sl st into chain. (61 stitches)
Row 7: Same as row 6 (82 stitches)
From row 8 onwards, crochet in a continuous spiral, no need to make a ch at the end of the row, use a stitch marker like a different colour thread of yarn to keep track of rows.
Row 8: (Sc in each of next 5 st, 2sc into next st) repeat 13 more times (96 stitches)
Row 9 -11 : Sc in each st
Row 12: Join yarn B, sc into next stitch with yarn B over yarn A using the tapestry crochet technique where you carry and crochet over the yarn not in use. Change back to yarn A, sc into the next 15 st by crocheting over yarn B. *sc with yarn B, sc in next 15 st with yarn A* repeat from * 4 more times.
Continue to follow the chevron pattern chart working in a spiral in single crochet stitches throughout.
Repeat the chevron pattern once more and then break off yarn B and work in Yarn A for 3 more rows or until the bag is the desired length (remember it will stretch). Bind off and thread in the loose ends.
Make Handles:
With either yarn A or B (I used half and half as I ran out) Ch 7, sc into 1st ch to make a loop. sc 7 stitches into the loop, and then continuing in a spiral dc into each st to make a continuous tube (or sc if you want the handle to be less stretchy). Continue until the tube measures between 80 cm and a metre (but remember to stretch the tube when you measure). Bind off leaving a tail of yarn with which to sew the two ends together.
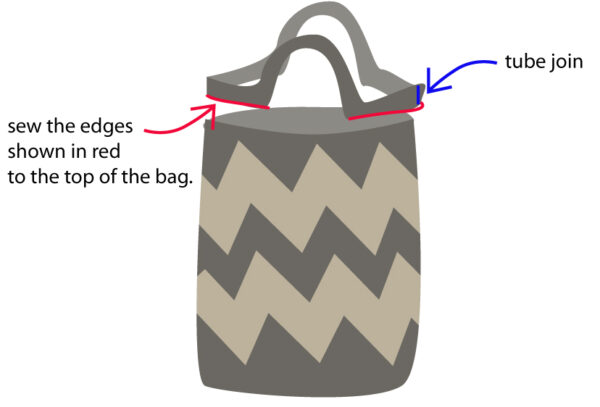
Sew the tube to the top of the bag as shown in the picture below using a tapestry needle and yarn. The part where the two ends of the tube are joined, should be sewn to the top of the bag so that it does not form part of the handle.
And there you go, a yoga bag that can also double as a shopper. I hope you crocheting yogis enjoy the pattern.
Happy Crocheting!

This pattern was originally published on the Yogahound blog which has now been placed with this website.

