
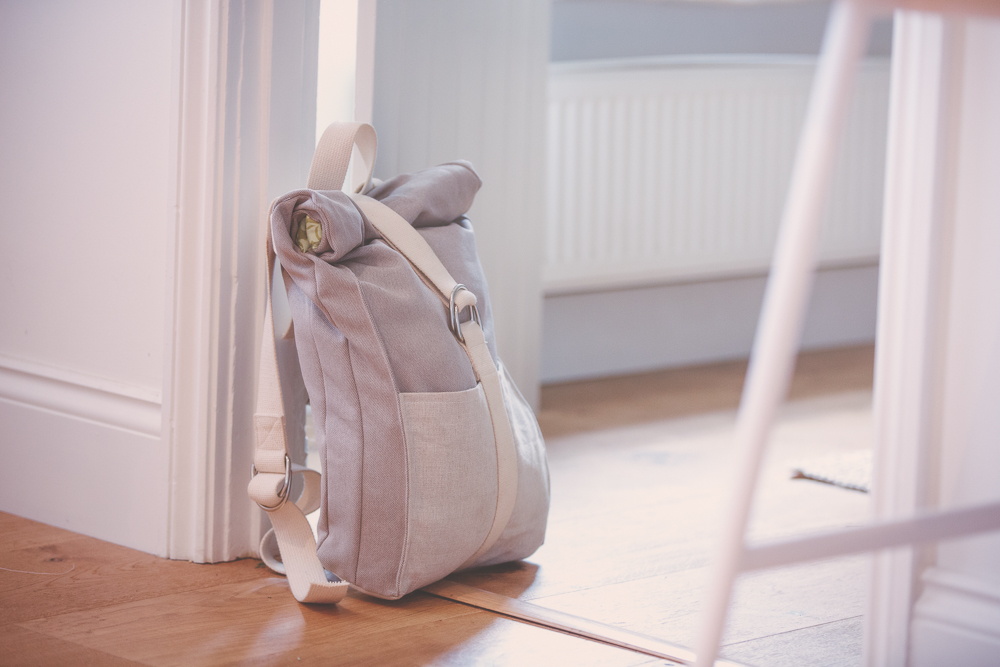
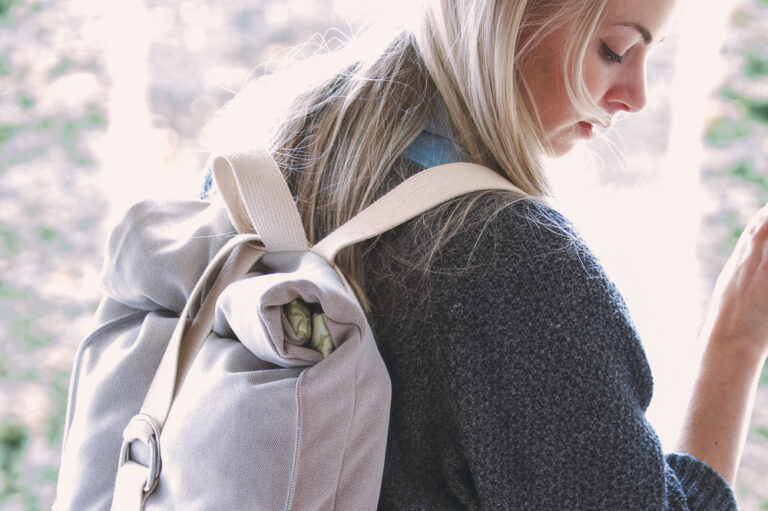
I used to head down to Brighton every couple of weeks to catch up with the publishing team at Quarto Publishing where I freelanced as an Art Director back in 2019 – it’s a long slog from Rutland (where I live) to Brighton & I needed to take my laptop on the train as well as a few books. I originally used a hiking backpack, but really wanted something a bit more subtle and professional looking. I really wanted a roll-top backpack and fancied the challenge of sewing one for myself. I wanted to use up some left over canvas fabrics I had from a few upholstery projects, but I didn’t have any webbing – except I did have a few old yoga straps in my yoga teaching kit! So here you have it now, I created my very own DIY roll-top backpack with yoga straps.
My backpack held up really well on numerous trips to Brighton (2.5hr train journey one way), even when I filled it with books for the trip home. This is a really quick and easy project that I completed in an afternoon… so I flung together a few instructions just in case anyone else fancied making one too.
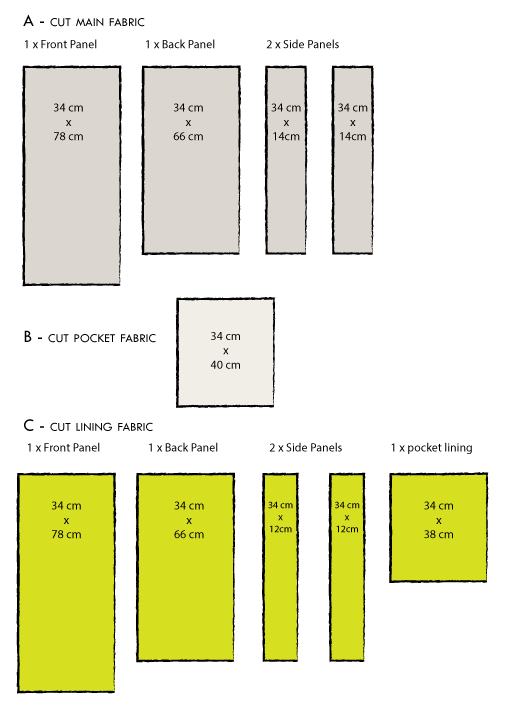
YOU WILL NEED
- Canvas fabric – 1 metre
- complimentary tone fabric for pocket – 34 cm x 40cm
- Lining fabric – 1 metre
- 3 x yoga belts with D-rings
INSTRUCTIONS
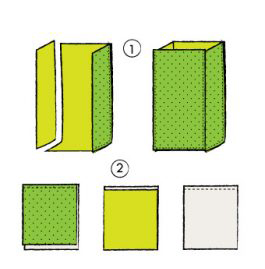
* DOTTED AREAS REPRESENT WRONG SIDE OF FABRIC
STEP 1
With right sides facing, sew the longer front panel of the lining fabric to the long side and short side of the side panels (the front panel forms both the front and base of the bag). Then sew the back panel into the side panels and bottom edge of the front panel. Press seams.
STEP 2
With right sides facing, line up the top edges of the lining fabric pocket and outer pocket fabric and sew a straight edge to join at the top. When you turn both panels the right way out, line up the bottom edge so that the outer pocket fabric is visible along the edge on the lining side. Press and topstitch to secure.
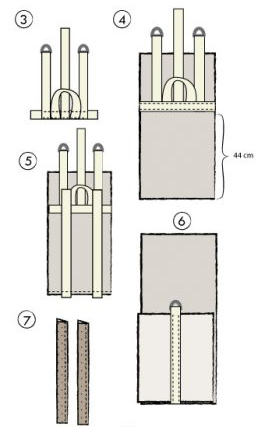
STEP 3
From the 3 x yoga belts cut the following lengths:
2 x shoulder straps with D-rings : 35 cm long (measuring just the webbing)
1 x closing strap : 55 cm long
1 x handle : 25 cm long
1 x horizontal strip : 35cm long
2 x bottom shoulder straps : 60 cm long
1 x buckle strap with D rings : 40 cm long (measuring just the webbing)
Now position the top shoulder straps, the handle and the closing strap on the horizontal strip as shown on the diagram. Sew in place.
STEP 4
Positioning the horizontal strip facing outwards, and 44cm above the bottom edge of the back panel of the canvas fabric, sew in place with a straight stitch edge long the top and bottom edge of the horizontal strip.
STEP 5
Baste the bottom shoulder straps to the bottom edge of the canvas back panel, lining them up with the top shoulder straps.
STEP 6
Sandwich the pocket panel between the front canvas panel and centred buckle strap. Sew the along the long edges of the buckle strap to secure.
STEP 7
Fold each of the side panels in half length wise,and press. Sew a straight edge 1cm to the side of the folded edge (the side panels should now measure 12 cm wide).
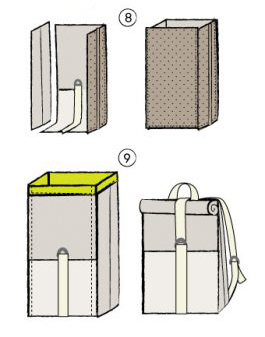
STEP 8
Following the method used for the lining, with right sides facing, and being careful to tuck the buckle and straps out of the way, sew the longer front panel to the long side and short side of the side panels. Then sew the back panel into the side panels and bottom edge of the front panel. Turn the right sides facing out and press seams.
STEP 9
To neaten and finish off the outside of the bag you can topstitch along the outer edges of the canvas sides, creating an inverted seam edge (it gives it that nice crisp, clean line edge). With the right side facing inwards, tuck the bag lining into outer canvas bag, fold the top edge outwards to conceal raw edges. Stitch in place and press. Join the top shoulder buckles to the bottom shoulder straps, and enjoy your backpack!
There you go, using the yoga straps saves time fitting the D-rings into the webbing, and you could go all multi-coloured with the straps if that takes your fancy.
Have fun, and don’t forget to tag us in the photos when you’ve made your bags! We’d love to see them.
Happy sewing!

– Originally Published in 2019 on the Yogahound blog, which is has now been replaced with this website.
